How to use Gstreamer AppSrc in Python
5 min. read |
With gstreamer appsrc element it easy to push buffers (ex.: numpy arrays) into gstreamer pipeline. Developer can benefit from a variety of already implemented gstreamer plugins and display image in window, write frame to a video file or send buffers over TCP/HTTP.
Requirements
- Ubuntu 18
- Python 3.6
- Gstreamer with Python Bindings. Look at “How to install Gstreamer Python Bindings on Ubuntu 18”
- gstreamer-python
Code
Learn how to?
- push Gst.Buffer in pipeline with appsrc
- convert numpy array to Gst.Buffer
- setup GstApp.AppSrc to push buffers
- display images using autovideosink
- record video into video file using x264enc, mp4mux and filesink
- setup proper frame rate (fpsdisplaysink)
When use AppSrc?
Working with videos using OpenCV there were some problems with video display (can’t be launched in multiple threads) and video recording (high volume of recorded video files, or requires custom library build with specific options).
With Gstreamer it is much easier as displaying/recording can be executed in multiple threads, is flexible due to variety of gstreamer plugins (tcp, http, window, video file, descriptor, ..). Of course there are some problems: installation (sometimes it is painful to install gstreamer), buffers duplication (when converting to Gst.Buffer).
Note: Further reading highly correlates with previous post on how to receive buffers from gstreamer pipeline in Python: “How to use Gstreamer Appsink in Python”
Guide
Define gstreamer pipeline
First, let us define simple pipeline with appsrc element that is going to accept RGB buffers with shape 640×480 and display them in window with constant speed 30 frames per second.
gst-launch-1.0 appsrc emit-signals=True is-live=True \
 caps=video/x-raw,format=RGB,width=640,height=480,framerate=30/1 ! \
queue max-size-buffers=4 ! videoconvert ! autovideosinkNote: queue is added to store buffers in exact order without buffers drop in case of overload. Limit queue size to max-size-buffers to reduce memory consumption (as when overload the size of queue could be huge)
Write python script
Import classes to work with Gstreamer pipeline in Python.
from gstreamer import GstContext, GstPipelineInitialize GstContext that hides all GLib.MainLoop routine to handle gstreamer events.
with GstContext():Initialize Gstreamer pipeline with a command defined previously (but omit gst-launch-1.0 keyword)
pipeline = GstPipeline(command)Setup AppSrc element
In order to get appsrc from pipeline use next line of code
appsrc = pipeline.get_by_cls(GstApp.AppSrc)[0] # get AppSrcNow, let instruct gstreamer appsrc element that we will be dealing with timed buffers. Check out all the options in Gst.Format.
appsrc.set_property("format", Gst.Format.TIME) Note: most stream muxers work with timed buffers.
Set target buffer format for appsrc.
CAPS = "video/x-raw,format=RGB,width=640,height=480,framerate=30/1"
appsrc.set_caps(Gst.Caps.from_string(CAPS)) # set capsNote: format (colorspace), width, height, fps are required for appsrc work properly
Additionally, setup appsrc to block accepting new coming buffers in case of internal queue overload, otherwise a lot of buffers are going to be dropped.
appsrc.set_property("block", True)Attention, all previous setup should be done before pipeline started. For this purpose class GstPipeline has method on_pipeline_init that is going to be executed when Gst.Pipeline inialized but not started yet. Let override current method:
def on_pipeline_init(self):
    appsrc = self.get_by_cls(GstApp.AppSrc)[0]
    appsrc.set_property("format", Gst.Format.TIME)
    appsrc.set_property("block", True)
    appsrc.set_caps(Gst.Caps.from_string(CAPS))

pipeline._on_pipeline_init = on_pipeline_init.__get__(pipeline)
Now, start pipeline
pipeline.startup()Let now generate random buffers (np.ndarray) and try to push them in our pipeline.
 for _ in range(NUM_BUFFERS):
     array = np.random.randint(low=0, high=255, \
                               size=(HEIGHT, WIDTH, CHANNELS),\
                               dtype=DTYPE)
In order to convert np.ndarray to Gst.Buffer you can use next approach:
def ndarray_to_gst_buffer(array: np.ndarray) -> Gst.Buffer:
    """Converts numpy array to Gst.Buffer"""
    return Gst.Buffer.new_wrapped(array.tobytes())
Or, just use ndarray_to_gst_buffer from gstreamer-python utils
import gstreamer.utils as utils
appsrc.emit("push-buffer", utils.ndarray_to_gst_buffer(array))
When we are out of buffers simply notify appsrc with end-of-stream event
appsrc.emit("end-of-stream")Stop pipeline at the end
pipeline.shutdown()Run example
Now, let put everything together and run examples. At the beginning clone gst-python-tutorials repository and install requirements.
git clone https://github.com/jackersson/gst-python-tutorials.git
cd gst-python-tutorials

python3 -m venv venv
source venv/bin/activate

pip install --upgrade wheel pip setuptools
pip install --upgrade --requirement requirements.txt
Simple displaying
First, launch simple display of randomly generated numpy arrays in a window.
python launch_pipeline/run_appsrc.py 
Display with framerate
Let’s, make it more difficult and check that video is playing with specified frame rate (30). For this purpose we’ll use fpsdisplaysink plugin that draws frame rate over a video or prints it to console.
But in order to calculate frame rate gstreamer’s fpsdisplaysink require pts and duration to be present and valid in Gst.Buffer. Type of each variable is GLib.MAXUINT64 (in nano seconds). So, just modify previous code with similar code
pts = 0 # buffers presentation timestamp
duration = 10**9 / FPS # frame duration
for _ in range(NUM_BUFFERS):
pts += duration
gst_buffer.pts = pts
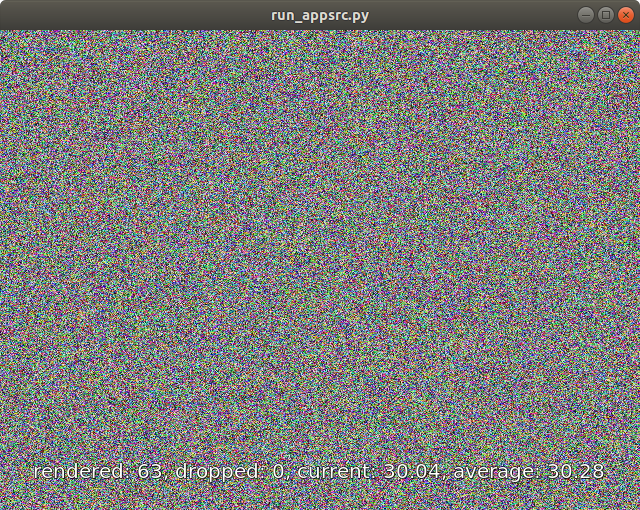
gst_buffer.duration = durationPerfect, now launch pipeline with fpsdisplaysink
python launch_pipeline/run_appsrc.py -p \
"appsrc emit-signals=True is-live=True \
caps=video/x-raw,format=RGB,width=640,height=480,framerate=30/1 ! \
 queue max-size-buffers=4 ! videoconvert ! fpsdisplaysink"
You should see something like this. And in average stream’s frame rate almost equal to 30 frames per second.
Writing video to file
In order to write video to file we need to convert buffers to H264 video stream (using x264enc plugin), place it into MPEG-4 media container (mp4mux) and record to file with filesink
python launch_pipeline/run_appsrc.py -p \
"appsrc emit-signals=True is-live=True \
caps=video/x-raw,format=RGB,width=640,height=480,framerate=30/1 ! \
 queue max-size-buffers=4 ! videoconvert ! \
x264enc pass=quant tune=zerolatency ! mp4mux !\
filesink location=video.mp4"Note:
- pass=quant indicates that bitrate of video stream is going to be best.
- tune=zerolatency reduces the encoding latency, but influences on video quality.
Now in current folder should be located short video file named “video.mp4“. Check the content of it and compare with displaying video previously.
Play with different gstreamer commands and check that everything works.
Conclusion
In this post we learned how to:
- setup gstreamer appsrc element to accept buffers from user applications
- convert np.ndarray to Gst.Buffer
- display randomly generated buffers in window
- write randomly generated buffers into a video file
- setup and display video’s framerate
Hope everything worked as expected 🙂 In case of any troubles, suggestions leave a comment.
How to set Gstreamer Plugin rank? (Hardware priority)

How to implement Object Detection in Video with Gstreamer in Python using Tensorflow?

Hello Taras,
I built gstreamer on an Ubuntu 18 PC by following your tutorial:
http://lifestyletransfer.com/how-to-build-gstreamer-from-sources-on-ubuntu/
Then, I built gstreamer Python bindings (gst-python) as described here: http://lifestyletransfer.com/how-to-install-gstreamer-python-bindings/.
I installed everything here: ~/work/gst/build-gst/install in order to keep system directories clean (/lib, /usr/lib etc.).
I used gst-plugin-check.py to verity that my installation works properly.
Now I would like to use an appsrc application. First of all, I would like to run your test application described in this article against the stuff I placed in ~/work/gst/build-gst/install. I suppose I have to set some environment variables to do that.
1) Can you tell me how to set up the environment to do that?
2) Beside gstreamer Python bindings, in this article you say that one needs gstreamer-python as well (https://github.com/jackersson/gstreamer-python). What’s the purpose of this package?
Thank you in advance for your help.
Hi LLandre,
Thanks for questions 🙂
Here are some thoughts:
1
The only export I do is GST_PLUGIN_PATH. For example:
export GST_PLUGIN_PATH=$GST_PLUGIN_PATH:$PWD/venv/lib/gstreamer-1.0/:$PWD/gst/Where:
– lib/gstreamer-1.0/ -> path to shared libs (*.so) of plugins
– gst/ -> path to python/ folder where python plugins implemented (look original example).
Also, gi.overrides (Gst.py, GstPbutils.py) are going to be updates with gst-python installation. Check this post (Common Issues Section).
P.S For the current tutorial there is no need to export any variables. Only gi.overrides update required (with gst-python installation)
2
gstreamer-python is a lightweight wrapper over PyGObject Gst API. It contains most common tools I use while working with gstreamer for video analytics applications. Also it contains an installation script to install gst-python automatically in local environment (as a part of pip package).
P.S. thank you for noticing that. I’m going to update README and add some relevant docs to understand project’s purpose and abilities.
Hope this helps 😉
Best regards,
Hi Taras,
to make things easier, I moved to a clean PC running a fresh installation of Ubuntu 18.04.
Here, I rebuilt all the packages (gstreamer, plugins, gst-python tag=1.16.2). I installed all of them in default directories (/usr/…), i.e. I did not use –prefix to install in a custom directory.
Then, I successfully installed gstreamer-python too (pip3 install git+https://github.com/jackersson/gstreamer-python.git@v0.0.2#egg=gstreamer-python).
However, I’m afraid I’m still missing something 🙁
sysadmin@nuc6-0:~/devel/hfr-camera/gst/build-gst/gst-python-tutorials$ python3 -c “from gstreamer.repository import GstContext”
Traceback (most recent call last):
File “”, line 1, in
ModuleNotFoundError: No module named ‘gstreamer.repository’
sysadmin@nuc6-0:~/devel/hfr-camera/gst/build-gst/gst-python-tutorials$ python3 -c “from gi.repository import GstContext”
Traceback (most recent call last):
File “”, line 1, in
File “/home/sysadmin/.local/lib/python3.6/site-packages/gi/importer.py”, line 133, in load_module
‘introspection typelib not found’ % namespace)
ImportError: cannot import name GstContext, introspection typelib not found
Hi Taras,
I got it working on the clean PC running a fresh installation of Ubuntu 18.04. I erroneously used
from gi.repository import …
instead of
from gstreamer import …
That being said, I still have a doubt about gst-python.
I had built and installed it as described here http://lifestyletransfer.com/how-to-build-gstreamer-from-sources-on-ubuntu/. I also had had to apply a manual fix to copy these files
_gi_gst.cpython-36m-x86_64-linux-gnu.so
_gi_gst.la
GstPbutils.py
Gst.py
to /usr/local/lib/python3.6/site-packages/gi/overrides.
IIUC, when I run
pip3 install git+https://github.com/jackersson/gstreamer-python.git@v0.0.2#egg=gstreamer-python
to build and install gstreamer-python, it seems that the build procedure rebuilds gst-python too (https://github.com/jackersson/gstreamer-python/blob/v0.0.2/build-gst-python.sh) and that it uses tag 1.14.5.
However, it seems that the files under /usr/local/lib/python3.6/site-packages/gi/overrides are left untouched.
How do I make sure that the resulting installation is consistent and that I didn’t mix 1.16.2 stuff with 1.14.5 stuff?
Thank you.
Hi,
Thank you for noticing that 😉
I updated gstreamer-python repository with ability to set GST_VERSION before installation. For example:
export GST_VERSION=1.16.2By default version is taken from “gst-launch-1.0 –version”.
Also now you can install gstreamer-python without building gst-python:
pip install . -v --install-option "build_py" --install-option "--skip-gst-python"Best regards,
Hello Taras,
unfortunately, I’m stuck again 🙁
My goal is to write an appsrc application that gets frames from an USB camera and injects them into a gstreamer pipeline.
As starting point I’m using your example (https://github.com/jackersson/gst-python-tutorials/blob/master/launch_pipeline/run_appsrc.py).
To handle the camera, I use a class named HFRCamera. I’m facing the following problem.
If the methods of the HFRCamera class are invoked after this line
from gstreamer import GstContext, GstPipeline, GstApp, Gst, GstVideo, GLib, GstVideoSink
python3 crashes (Aborted (core dumped)).
So it seems there is something in HFRCamera conflicting with gstreamer-python.
Can you advise me on how to investigate this issue?
Thank you.
Hi,
Can I see some code?
You can contact me via email: taras.lifestyletransfer@gmail.com or linkedin (top-right icons)
Thanks for such great tutorial. Is it possible to provide another example to cover asynchronous data producer mode than the sync. one with numpy random ndarray? For example, I run into this problem. I have a PyQT OpenGL rendering code to render frames with GLSL in the main UI thread (QT). The “GstContext” runs in a Thread with GLib main loop. My idea was to use a thread-safe queue (e.g. collections.deque) but did not success (no output from the video sink end). I managed to make my pipeline works via FIFO (stdin) and Gstreamers’ “fdsrc ! rawvideoparse”. But it is relatively slow. That’s why I would like to conduct a benchmarking on your “appsrc” approach but was stopped by the possible asyn. handling.
Hi,
Probably this example can help: rtsp-server-using-appsrc.
You can subscribe to appsrc’s “need-data” event, and in callback function push buffer into pipeline. It is quite useful for RTSP-sever case, so it can be useful in your case also.
Have a good day,